

Photo by Paul Hanaoka on Unsplash
Deploying A Strapi CMS To Google Cloud Run
Learn how to deploy your Strapi CMS to Google Cloud Run with continuous deployment from your GitHub repo.


Table of contents
Introduction
In recent articles, we've been learning how to set up a Strapi CMS to manage all of your business's content. However, if you want to use your CMS in production, you're going to need to host it on some server. In this article, we're going to be learning how we can use Google Cloud Run to host your CMS.
Why Cloud Run?
Google Cloud Run is a serverless container management platform. This means that you will only be charged for hosting your CMS when a request is made to it, which is much cheaper than paying for a server 24/7. In addition, your app will auto-scale to meet all of the traffic demands you can throw at it. This is great because it means we don't have to worry about scaling our app up or down to meet the demand.
The only drawback with Cloud Run is that if a request has not been made to your CMS in a while, your app will be put to sleep until the next request. When the next request is made, your app will have to start up again, which could take 20 seconds. This is called the cold problem. You can solve it by setting your minimum running instances of your container to one, however, note that you will incur the costs for always having an instance of your CMS running.
Implementation
Navigate to the root of the folder you've been using for the previous tutorials. Now you will need to push your code up to GitHub. If you do not know how to do this here's a nice tutorial explaining how. NOTE: It is important that the name you give to your GitHub repository is in lowercase, otherwise you may run into issues in further steps.
Once you've got your code pushed to GitHub, navigate over to GCP (Google Cloud Platform). As of the time of writing, GCP gives you a free $300 credit for the first year to try out the platform as a nice bonus.
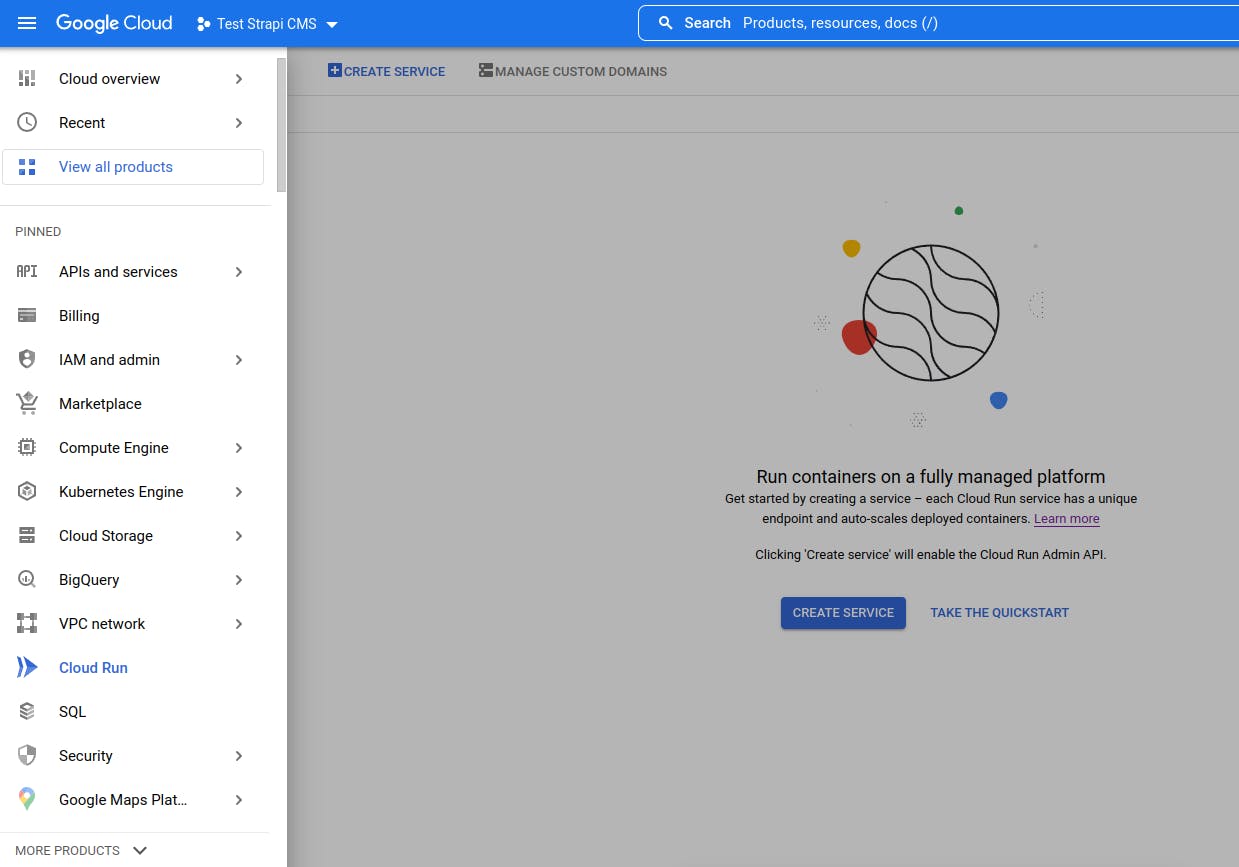
From your GCP console and select the project (or create a new one) that you want your Strapi CMS instance to belong to. Now navigate to the Cloud Run and then press Create Service.
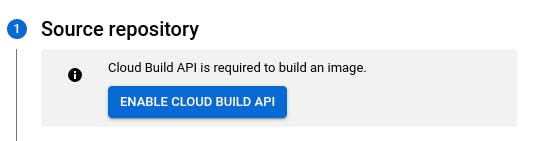
Select the Continuously deploy new revisions from a source repository option, and then press Set up with cloud build. Enable the cloud build API if you have not already, choose the GitHub repository provider option.
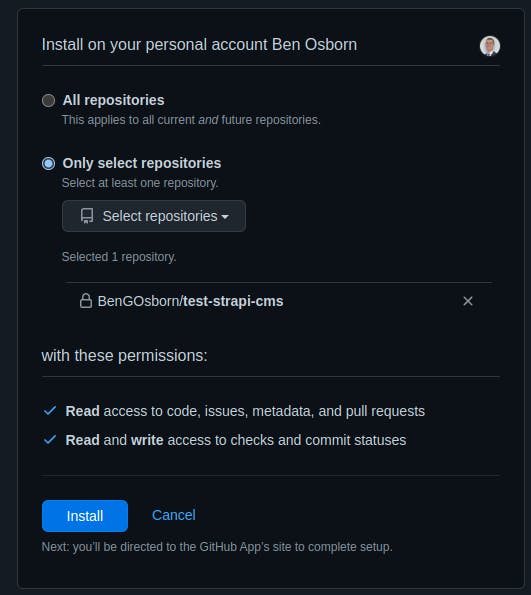
Under the repository select option, select Manage connected repositories, choose the account that your repository belongs to, choose Only select repositories, then select your Strapi CMS repository, then press Install. Once you have set up your repository with cloud build, select your repository and then press Next.


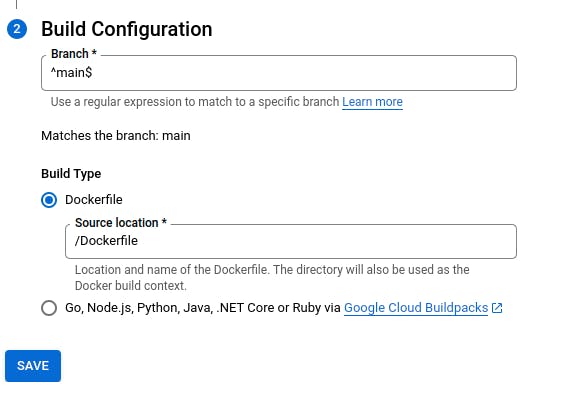
Now under Build Configuration, choose your branch and then select the Dockerfile build type. Finally press Save.
Now that you've finished setting up your CD pipeline, every time you push a change to your deployment branch, your CMS will be redeployed.
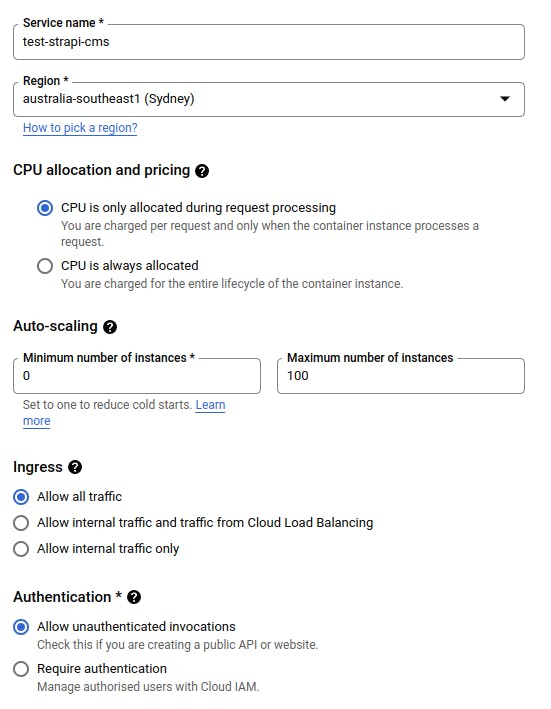
Next, give your app a name, choose the region you want your CMS to be hosted in, then choose the CPU is only allocated during request processing option. Under Auto-scaling, keep your Minimum number of instances to 0. Under Ingress choose Allow all traffic, and under Authentication choose Allow unauthenticated invocations.
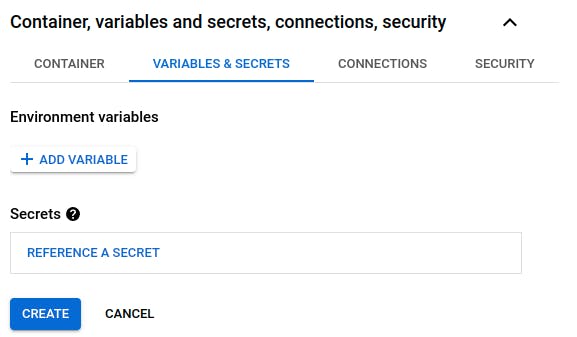
Now open up Container, variables and secrets, connections, security, navigate to the Variables & Secrets tab, and then add the environment variables from your .env file (except for the PORT variable, as cloud run will set this automatically). Once you've finished adding your variables press Create, and then wait for your CMS to be set up.
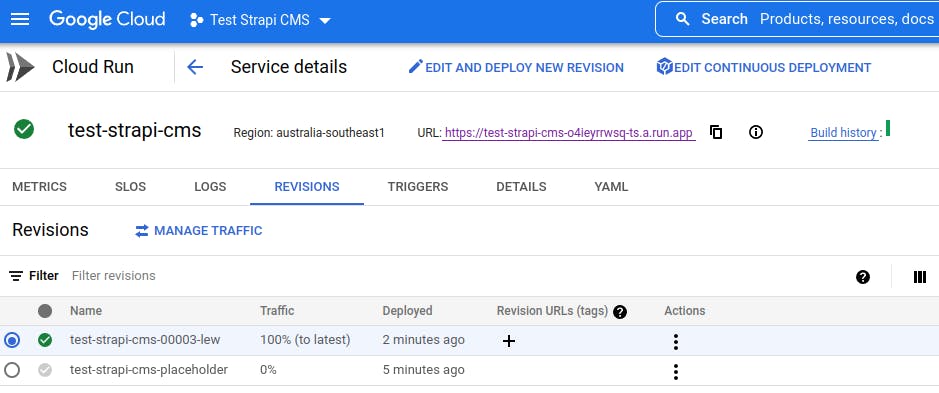
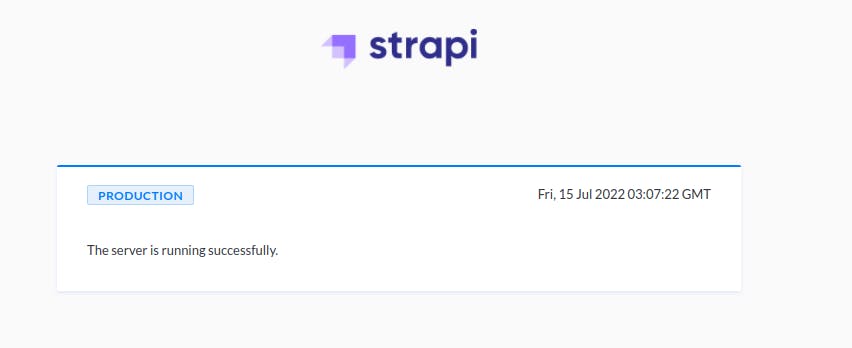
Once all of the ticks are green you can navigate to the URL your CMS is hosted at. If you did everything correctly, you should be greeted with a welcome message from your CMS!
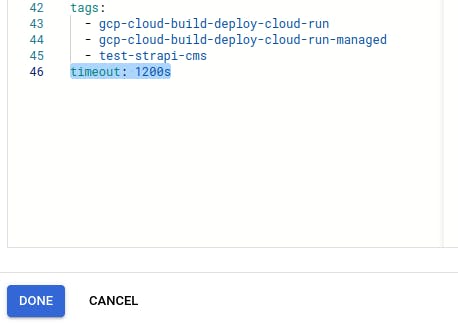
Now we're just going to make some slight changes to the cloud build script. By default the cloud build script will time out after roughly 10 minutes, however, sometimes it takes longer to build your Docker image.
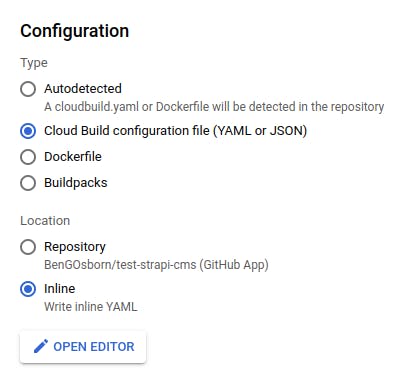
To fix this, press Edit continuous deployment from your cloud run instance service details.

Navigate down to Configuration, and press Open Editor to edit the deployment YAML file that was auto-generated. At the bottom of the configuration add the following line timeout: 1200s. This will make it so that your build will time out after 20 minutes, giving your app plenty of time to build. Once you're finished, press Done, and then save your changes by pressing Save.
Conclusion
So now you know how to deploy your Strapi CMS to Google Cloud Run to allow your CMS to be accessed from anywhere in the world 24/7 whilst only incurring costs when a request is made to your service and allowing your app to scale to the moon with no extra effort necessary!