

Photo by Pedro da Silva on Unsplash
Uploading Media To A Strapi CMS Using Amazon S3
Learn how to configure your Strapi CMS to store uploaded images in Amazon S3.


Introduction
Previously we looked at how to set up a Strapi CMS and containerize it using Docker. However, what if you want to upload media-like images to your CMS? Today we're going to address this problem by learning how to upload images to your Strapi instance and storing those images on Amazon S3.
Why S3
Amazon S3 takes care of storing and handling your media for you. It automatically scales to meet your storage needs, ensures safety and security, and is extremely affordable whilst also providing a very generous free tier.
There are a few other cloud platforms that provide alternatives to S3 you could use for example Google Cloud storage buckets or Digital Ocean spaces, however, S3 is by far the most widely used storage provider so it will be beneficial for you to become familiar with it.
Implementation
Creating a S3 bucket
Start off by heading to the AWS console and navigate to the S3 dashboard, then select Create bucket.

Give your bucket a name, choose a region, set ACLs enabled and Bucket owner preferred. Uncheck Block all public access, uncheck Block public access to buckets and objects granted through new access control lists (ACLs) and Block public access to buckets and objects granted through any access control lists (ACLs), then check the rest.
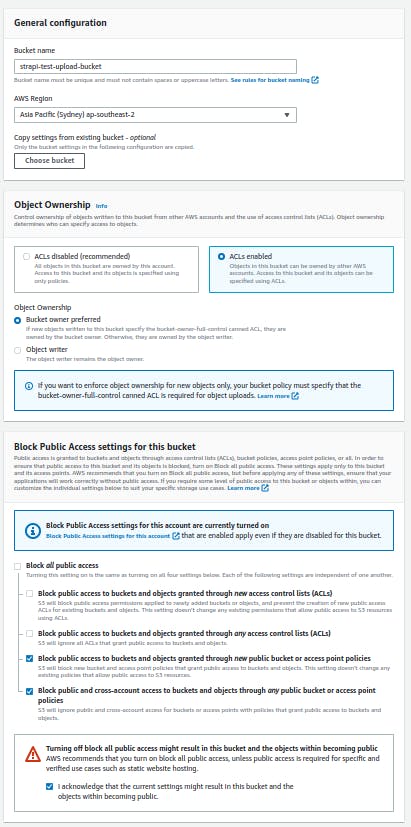
Finally press Create bucket.

Note that it is not recommended by AWS to create a public bucket as it allows for anyone to access ALL of the data in your bucket, where you are charged for every file viewed. However, for this example, it will be fine as we are only uploading images we wish to be public into the bucket.
Setting Strapi up for media uploads
Next, navigate to the root directory that contains your Strapi instance and run the command npm install @strapi/provider-upload-aws-s3.
Now create a new file ./config/plugins.js (or modify your existing file) and add the following code:
module.exports = ({ env }) => ({
  upload: {
    config: {
      provider: "aws-s3",
      providerOptions: {
        accessKeyId: env("AWS_ACCESS_KEY_ID"),
        secretAccessKey: env("AWS_ACCESS_SECRET"),
        region: env("AWS_REGION"),
        params: {
          Bucket: env("AWS_BUCKET_NAME"),
        },
      },
    },
  },
});
Now update your .env file with the corresponding environment variables.
Configuring Strapi to be compatible
By default Strapi blocks images / scripts from unapproved URL's from loading. To allow images from our S3 bucket to load so that we can see them from the Strapi admin panel, replace the contents of your ./config/middlewares.js with the following:
module.exports = ({ env }) => {
  const imageHost = "YOUR_IMAGE_HOSTNAME";

  return [
    "strapi::errors",
    // "strapi::security",
    {
      name: "strapi::security",
      config: {
        contentSecurityPolicy: {
          directives: {
            "script-src": ["'self'", "'unsafe-inline'", "cdn.jsdelivr.net"],
            "img-src": [
              "'self'",
              "data:",
              "cdn.jsdelivr.net",
              "strapi.io",
              "dl.airtable.com",
              imageHost,
            ],
          },
        },
      },
    },
    "strapi::cors",
    "strapi::poweredBy",
    "strapi::logger",
    "strapi::query",
    "strapi::body",
    "strapi::session",
    "strapi::favicon",
    "strapi::public",
  ];
};
Make sure to replace YOUR_IMAGE_HOSTNAME with your S3 hostname.
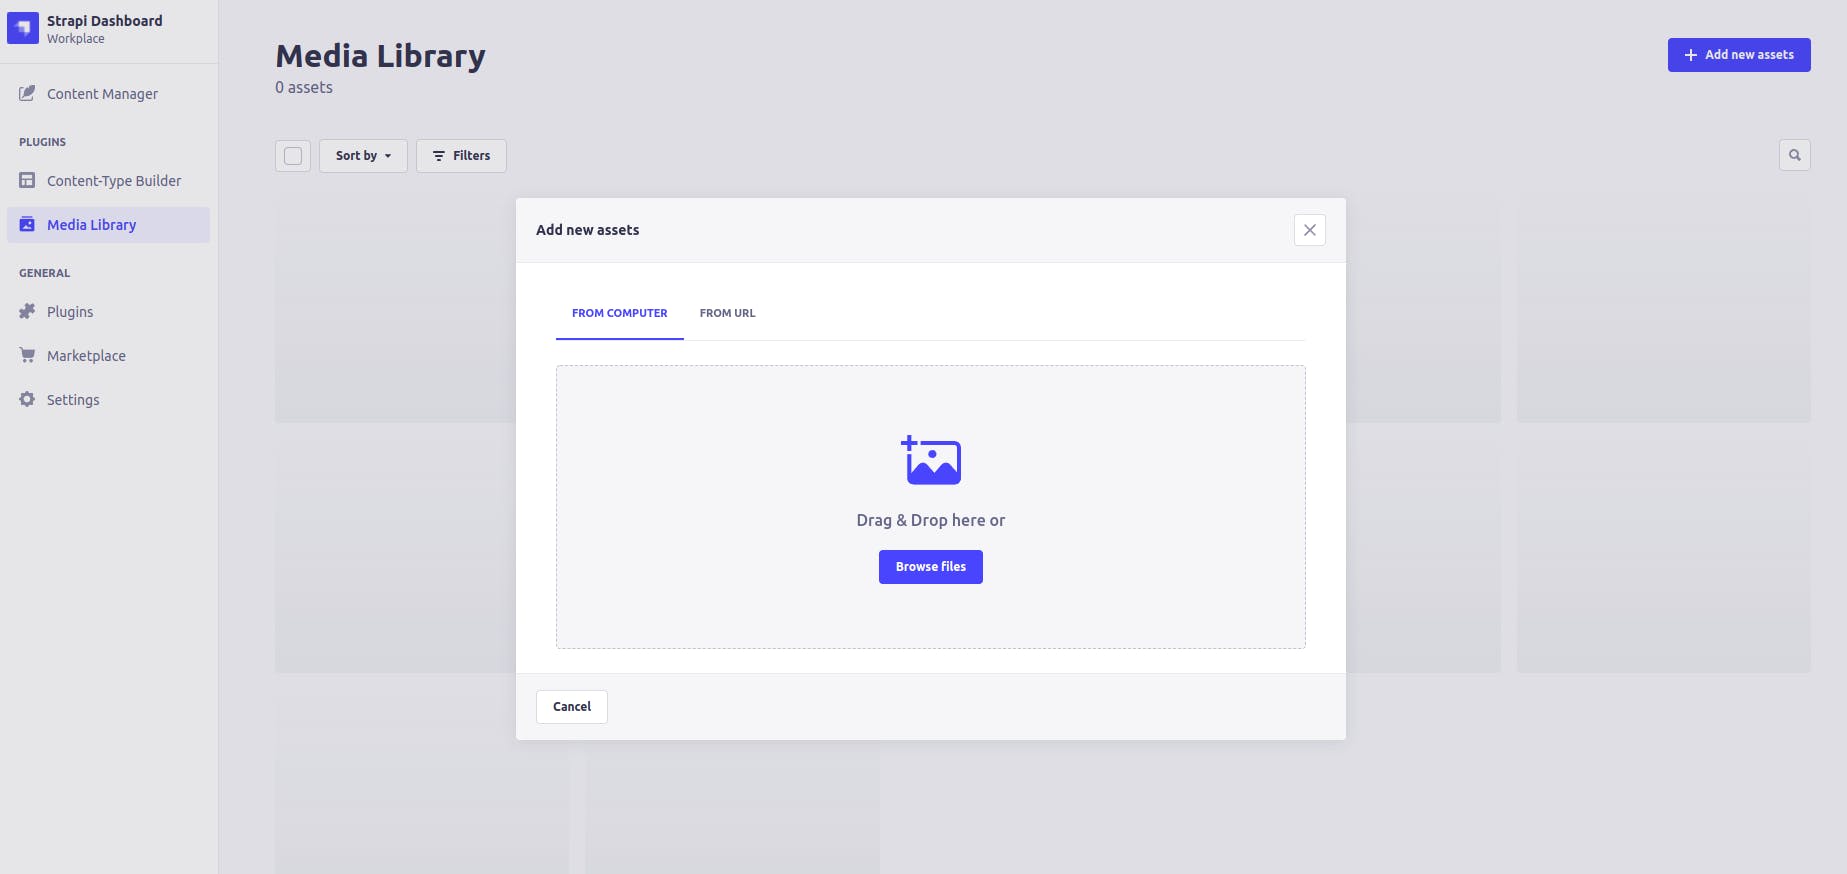
Now run npm run develop to start your Strapi instance. Navigate to the admin dashboard as displayed from the console, navigate to Media Library, Browse files, choose a file to upload, and then Upload 1 asset to library.
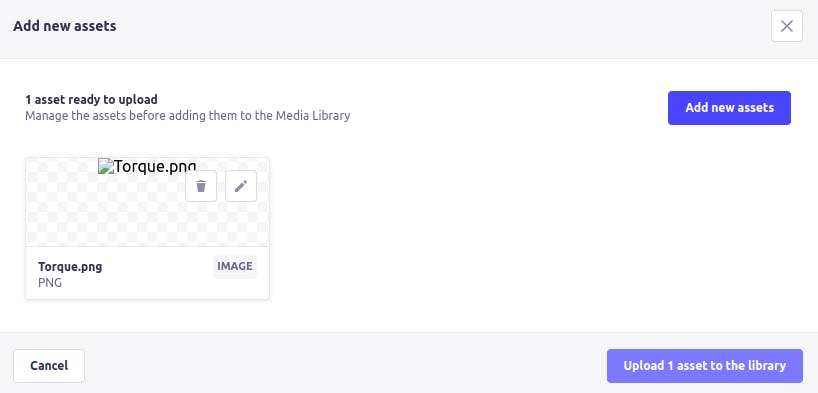
Once your image has been uploaded, if you have done everything correctly, you should see your image visibly displayed in your media library!
Conclusion
So now you know how to upload images to your Strapi CMS and store them in Amazon S3! In future blogs, we will discuss how to deploy your CMS to Google Cloud Run allowing your application to be scalable and cost-effective, as well as how to integrate with Algolia.